Basics/ Celebrations

Inverted Puff Pastry

Hello sweet tooth lovers!!

Today I’m bringing you a recipe that’s often feared, but will definitely make you happy!

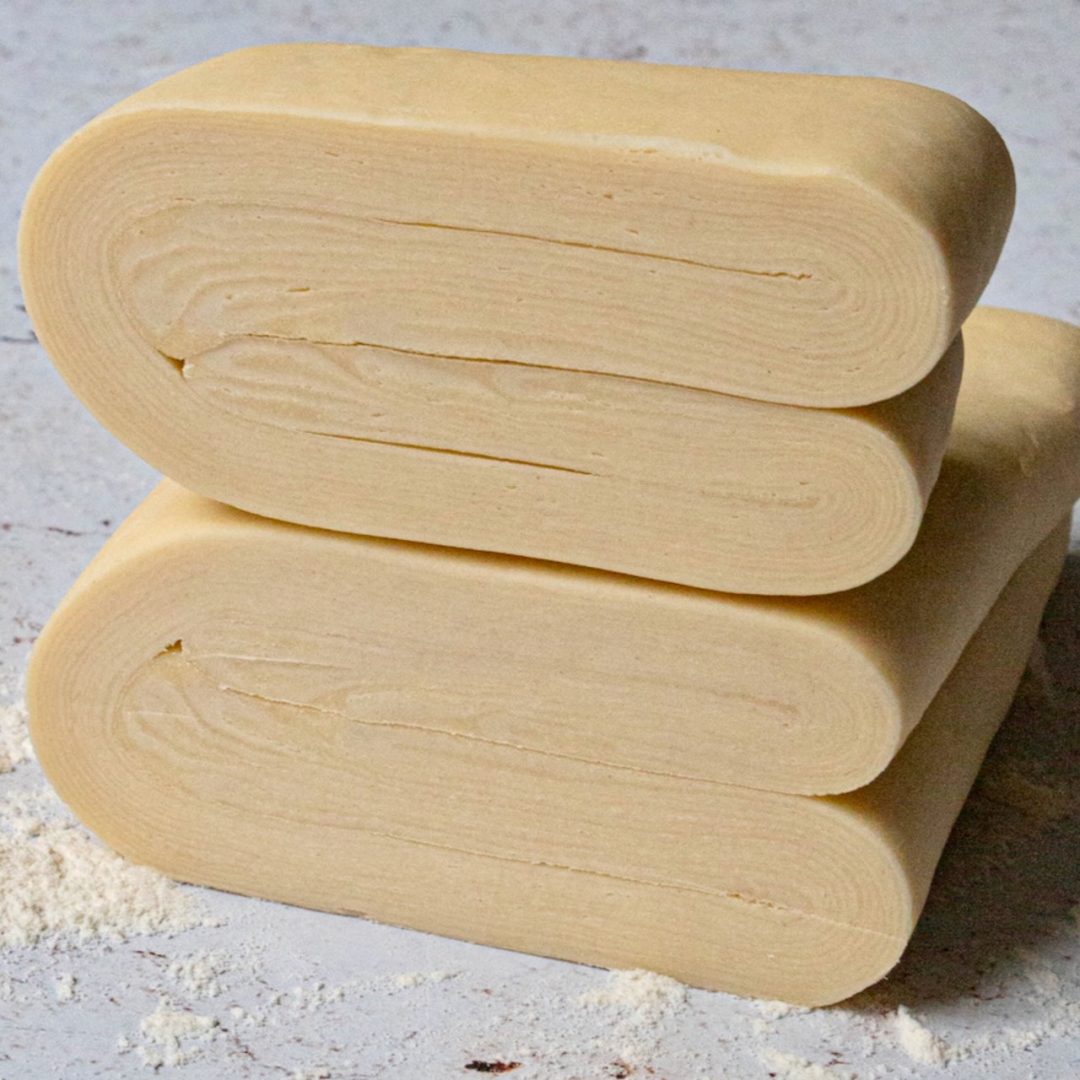
Here comes the inverted puff pastry (or inverse puff pastry).

The origin of my recipe

I used the recipe from Chef Philippe Conticini — you know how much I love his creations… He’s one of those chefs you can always trust; everything is clearly explained, no need for obscure ingredients… In short, it’s always a success if you take your time… And that’s exactly what I advise you to do here.

My tip to succeed with your inverted puff pastry: take your time

Time is key here since it takes about 12 hours to prepare this inverted puff pastry. Most of that time, don’t worry, is just resting time in the fridge!! You won’t be rolling out dough and folding for hours!! 😉

Inverted? What does that mean?

So why inverted puff pastry? The Chef explains it all in his book “Sensations”. Placing the butter on the outside — rather than inside the dough like with classic puff pastry — gives a more crumbly structure after baking and thus a more airy and light feeling.

Where does this idea of inverted puff pastry come from?

Inverted puff pastry originated in France, just like the classic version, but it’s considered a more recent technical evolution, often attributed to 20th-century master pastry chefs, notably Gaston Lenôtre and his successors.

Key difference:

In classic puff pastry, you enclose the butter in a détrempe (a mix of flour, water, and salt), then perform the folds.

In inverted puff pastry, it’s the opposite:
the butter dough (butter + a bit of flour) wraps around the détrempe.

This inversion makes the dough:

  • more delicate to handle, especially at room temperature,
  • but more tender, crispier, and with a finer, more regular layering.

Likely origin:

  • Gaston Lenôtre (1920–2009), a major figure in French pastry, is often credited as one of the first to popularize this technique during the 1970s–80s. He didn’t “invent” it per se, but he perfected and taught it widely, especially through the Lenôtre school.
  • Inverted puff pastry is thus a product of modern professional pastry, developed for optimal texture — especially in millefeuilles, king cakes, or delicate tarts.

Inverted puff pastry is a contemporary French technique, rooted in high-end pastry-making, reflecting a pursuit of precision and excellence in the art of lamination.

More tips just for you

To make this inverted puff pastry a success, here are my tips:

  • take your time (you got that, right!!)
  • use quality ingredients (butter and cream)
  • and always respect the resting times to get a dough with good structure, which is much easier to work with when cold. You can even pause overnight if needed by leaving your dough in the fridge.

Final tip: once your dough is rolled out, be sure to cut it with a very sharp knife. A clean cut is essential to reveal the layers…

A crisp pastry you can use however you like

I chose to do a 4-layer fold to increase the lamination. So you can stick to 5 turns here. Or do a more classic 3-layer fold, as suggested by Chef Conticini.

This inverted puff pastry is perfect for a delicious frangipane king cake, a pear and hazelnut version, a classic apple version, a millefeuille or a tart!

Essential tools:

A stand mixer with the paddle attachment

Two silicone baking mats or parchment paper sheets

And a good rolling pin.

That’s it…

Ready to give it a try??

Let’s go, Chef!

Inverted Puff Pastry

1 Star2 Stars3 Stars4 Stars5 Stars ( Vote !)
Loading...
pastry French
Serves: 750 g Difficulty: Medium Price: $
Prep Time: 12 hours

Ingredients

  • 300 g flour
  • 125 g full-fat liquid cream
  • 300 g butter at room temperature
  • 1/2 heaped teaspoon of salt or 3 g
  • 1/2 tablespoon of water or 5 g

Instructions

1

Make the détrempe.

2

Take 200 g of flour out of the 300 g and pour it, along with the salt, into your mixer bowl. Add the water and cream while mixing on low speed (2 out of 6).

3

Gather the dough and shape it into a neat ball by hand. Wrap it in plastic wrap and chill in the refrigerator for 2 hours.

4

Prepare the beurre manié.

5

Place the butter and the remaining flour into the mixer bowl. Mix for 2 minutes on low speed (2 out of 6) until you have a uniform mixture.

6

Mix 2 minutes more on medium speed (3–4 out of 6).

7

Transfer the resulting dough to a silicone baking mat or parchment paper.

8

Roll it out into a rectangle measuring 17 cm × 32 cm (about 7–8 mm thick).

9

Chill in the refrigerator for 2 hours, covering it with a sheet of parchment paper to prevent it from drying out.

10

Shape and perform the turns.

11

Roll the détrempe into a square of 17 cm × 17 cm.

12

Place the détrempe in the center of the beurre manié. Fold the two butter dough flaps in toward the center over the détrempe.

13

Roll the combined dough out until it is about 35 cm long.

14

Fold the left quarter over onto the next quarter, then fold the right quarter over onto its adjacent quarter. Finally, fold the two left-folded quarters over the right ones—this creates a 4-layer fold. This is your first turn.

15

Rotate the dough by a quarter turn, roll it out again to 35 cm, and repeat the folding. This is the second turn.

16

Wrap in plastic wrap and refrigerate for at least 30 minutes.

17

Repeat the process to perform a third and fourth turn.

18

Wrap again and chill for another 30 minutes.

19

Repeat once more to complete the fifth and sixth turns.

20

Finally, wrap in plastic wrap and refrigerate for at least 1 hour before you use the pastry.

You Might Also Like

No Comments

Leave a Reply

Retrouvez mes recettes et vidéos sur Instagram !