Celebrations/ Chocolate/ Snack

Christmas Shortbread House

Hello friends!

I’m officially kicking off the Christmas preparations today and we’re going big, really big!! And I hope you’ll love it as much as I do!!

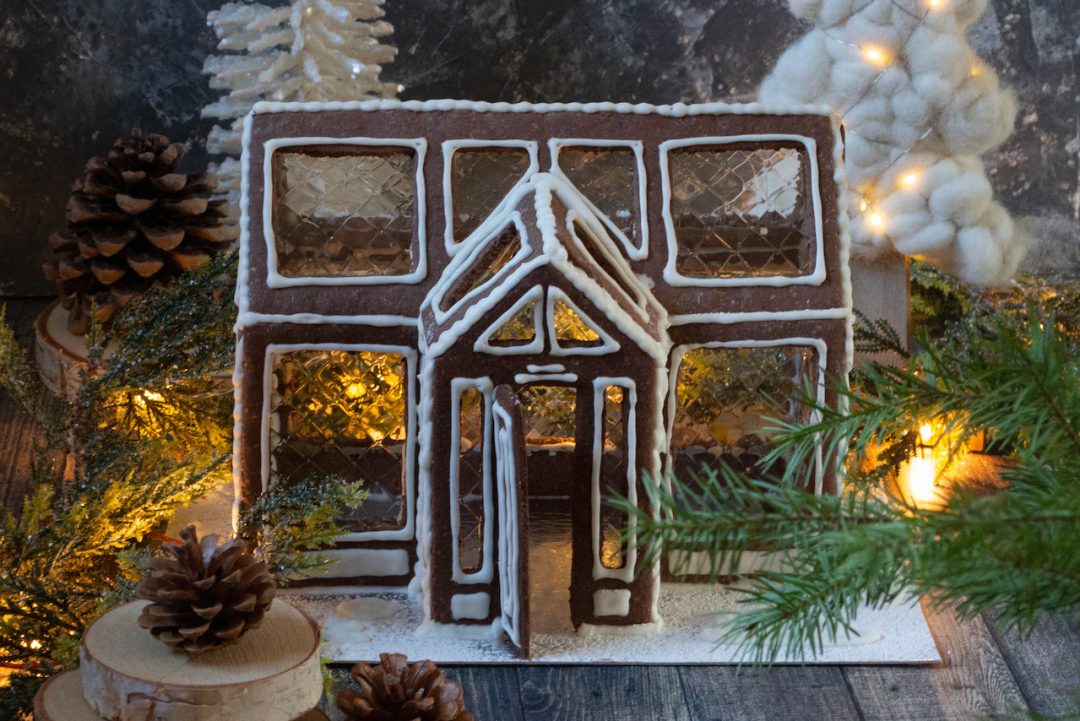
Here is my Christmas shortbread house!!!!

My inspiration for this Christmas shortbread house

So I’ll tell you everything as usual… I was looking for inspiration all over the place, especially on Pinterest. I spent quite a bit of time browsing through all sorts of amazing creations. I knew I wanted a house that would let light through, with gelatin windows and then, oh miracle, I found my Christmas shortbread house!!

But it wasn’t that simple…

Obviously, to make things harder for myself, I found my model on a site in a language I didn’t understand. Was it Swedish, Danish, or maybe Hungarian… no idea! But there it was. And that’s when things got complicated! Let me explain…

So I cobbled something together to give you a proper, detailed recipe

On this site, no template to download, no understandable instructions (at least for me!). So I did everything my own way, keeping an eye on the original model. I’m making it easier for you here, of course, since you can use my templates and save yourself a lot of time. I had to dig deep into my distant memories of spatial geometry to figure out the right dimensions, but I made it, and my Christmas shortbread house is the proof!! Yay! Feel free to let me know in the comments what you think…

Here is the template for your Christmas house!

Take your time, you’ve got this!

Honestly, there’s no real difficulty when it comes to baking. You’ll need to make a cocoa shortbread dough and some royal icing — piece of cake! The real challenge lies in assembling the Christmas shortbread house. Make sure to plan enough time!

Here are my tips to succeed with this Christmas shortbread house:

  • prepare your shortbread dough the day before (or even two days before), and keep it in the fridge
  • cut out and bake your shapes the morning of D-day (or the day before)
  • then decorate each piece: walls, roof, door
  • and when it’s time to assemble, make sure you have at least 2–3 hours ahead of you. Let it dry at each stage to avoid a house of cards situation. And don’t hesitate to go heavy on the icing as glue!

A video to help you assemble the Christmas shortbread house

At every step, make sure to keep your royal icing in a piping bag, ideally closed with a clip to prevent it from drying out. I used my icing over 2 days and had no issues.

Here’s the assembly video, it might help you!

Tools you’ll need:

A stand mixer to make the dough (doing it by hand works too),

A baking mat or parchment paper on a baking tray,

A rolling pin,

A thin-bladed knife to cut the dough,

A piping bag with a #4 tip (or a freezer bag with a small corner snipped off)

And a base to place your house on.

Other recipes that will wow your guests!

I’m so excited to share this Christmas shortbread house with you! While making it, I was thinking of all the sweet treats we could make together for the holidays, like my Scandinavian Christmas village, for instance. And if you’re looking for more cookie ideas, don’t forget to check out my Christmas Cocoa and Spread Bredele cookies, which are a real delight to share with family. And for cake lovers, I highly recommend trying the Princess Cake, which will bring a touch of elegance to your Christmas table. I can’t wait to see your creations and share even more magic with you!

There you go!!! You’ve got everything you need to make your Christmas shortbread house!!

Let’s go! The recipe, Chef!

Christmas Shortbread House

1 Star2 Stars3 Stars4 Stars5 Stars ( Vote !)
Loading...
pastry French
Serves: 1 Difficulty: Medium Price: $
Prep Time: 20 min + 4 hours Cooking Time: 12 min

Ingredients

  • Dough
  • 150 g of butter at room temperature
  • 225 g of icing sugar
  • 3 medium eggs
  • 180 g of whole hazelnut powder
  • 25 g of cocoa powder
  • 550 g of flour
  • Icing
  • 35 g of egg white (1 egg white)
  • 200 g of icing sugar
  • 4 drops of lemon juice
  • Decoration
  • 11 sheets of gelatin
  • 1 tsp of icing sugar

Instructions

Dough

1

Mix the softened butter and icing sugar for 2–3 minutes in the bowl of your stand mixer.

2

Add the eggs, then the hazelnut powder and cocoa. Mix well until the mixture is smooth and homogeneous.

3

Add the flour and mix thoroughly.

4

Chill in the refrigerator for 1.5 to 2 hours.

5

After this time, preheat your oven to 180°C (350°F).

6

Roll out your dough to a thickness of 4 mm.

7

Cut out your shapes (the dough should be very cold).

8

Bake for about 12 minutes.

9

Once out of the oven, place them on a wire rack until completely cooled.

Royal Icing

10

Place all ingredients in a bowl.

11

Mix well until you get a smooth, syrupy consistency.

12

Put the icing into a piping bag fitted with a #4 tip.

13

Decorate each of your elements as desired and let dry for at least one hour (more if possible).

14

Attach the windowpanes cut from the gelatin sheets with a bit of icing on the side of the piece that will face the inside of your house.

15

Keep the remaining icing in the piping bag.

Assembly (ready?)

16

Take the back wall of your house, apply icing to the bottom edge and place the wall on your base.

17

Hold this wall upright using, for example, a rectangular baking dish on each side. Let it dry for at least 30 minutes.

18

Continue using the same method each time: icing on the bottom edge and icing on the side edge that connects to the adjoining piece. Always allow drying time at each stage.

19

Once your walls are up and fully dry, finish assembling with the roof and door.

20

Reinforce all the joints well with icing.

You Might Also Like

No Comments

Leave a Reply

Retrouvez mes recettes et vidéos sur Instagram !