
Coucou les gourmands !!
Alors aujourd’hui, c’est une première moi !! C’est la première fois que j’associe la pistache et les fruits rouges (oui je sais … j’ai 2-3 trains de retard !!).
Mais peut-être que ça valait le coup d’attendre parce que la recette que je vous livre maintenant est C-A-N-O-N !!!!
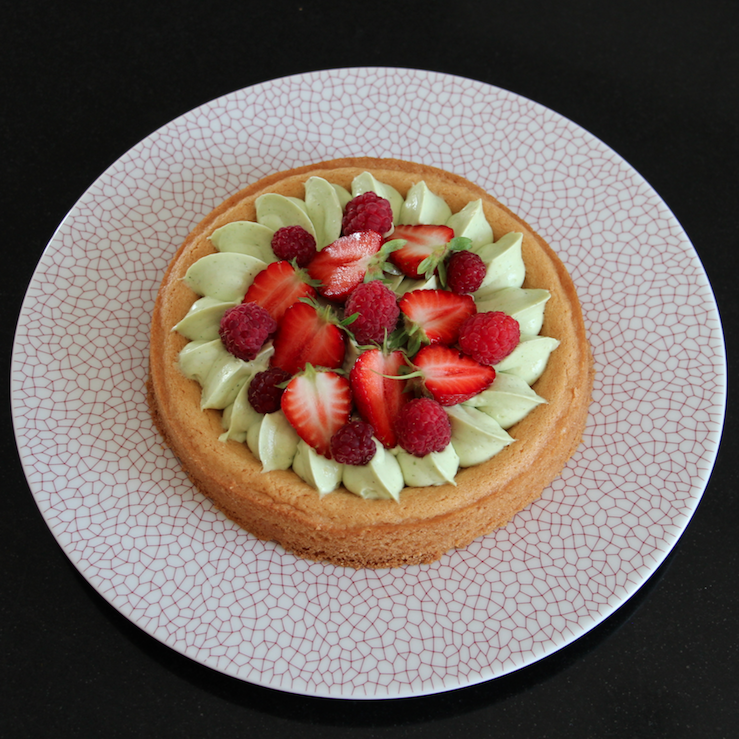
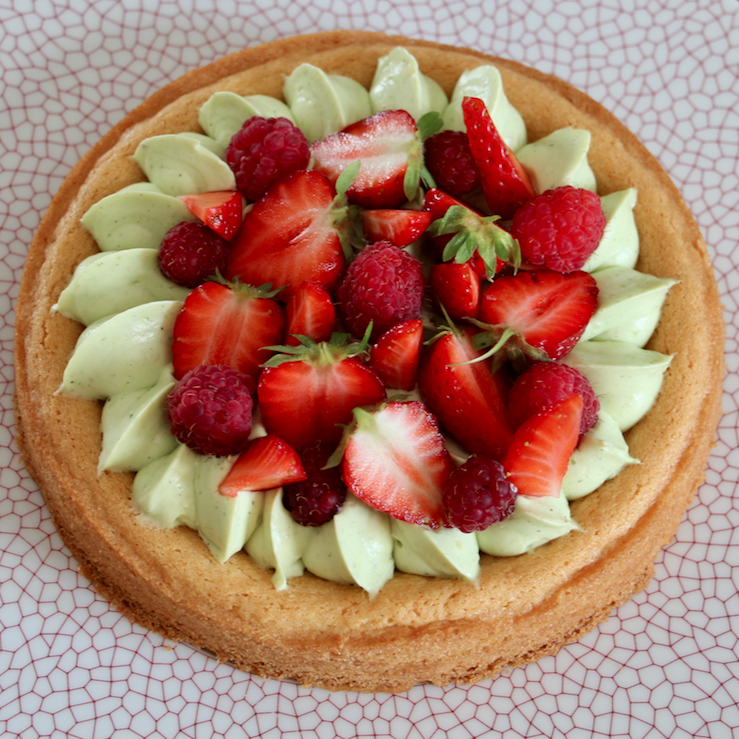
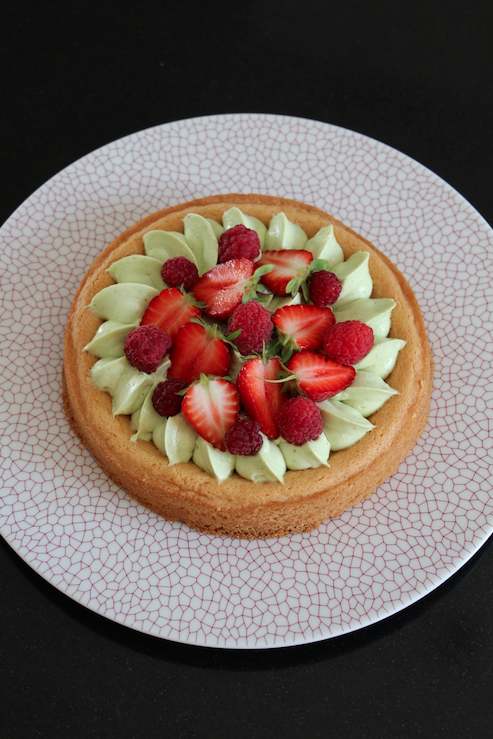
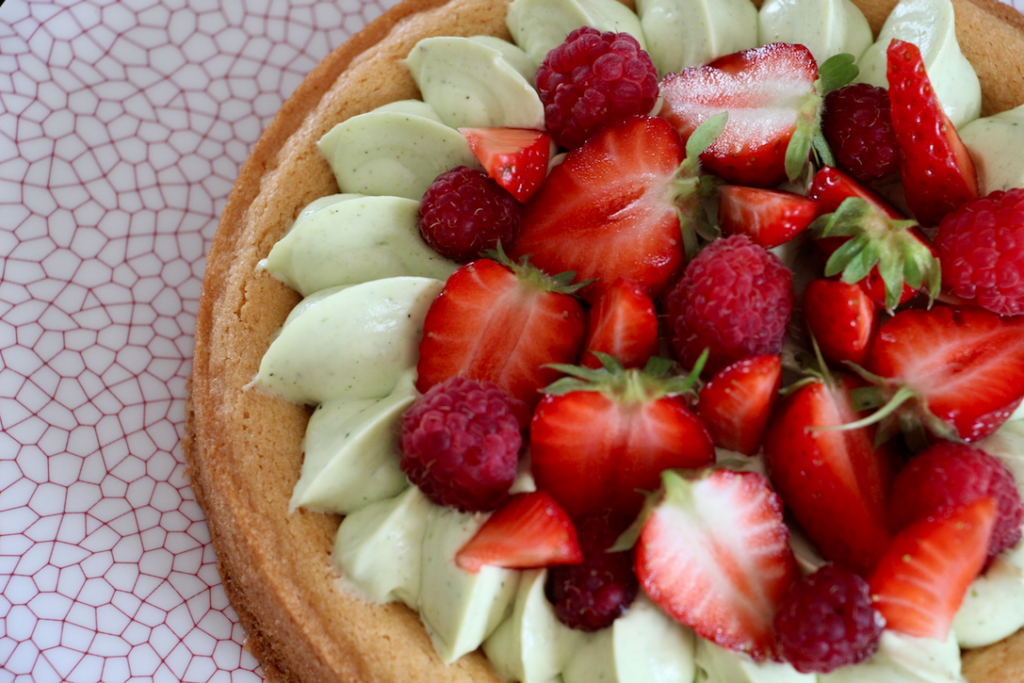
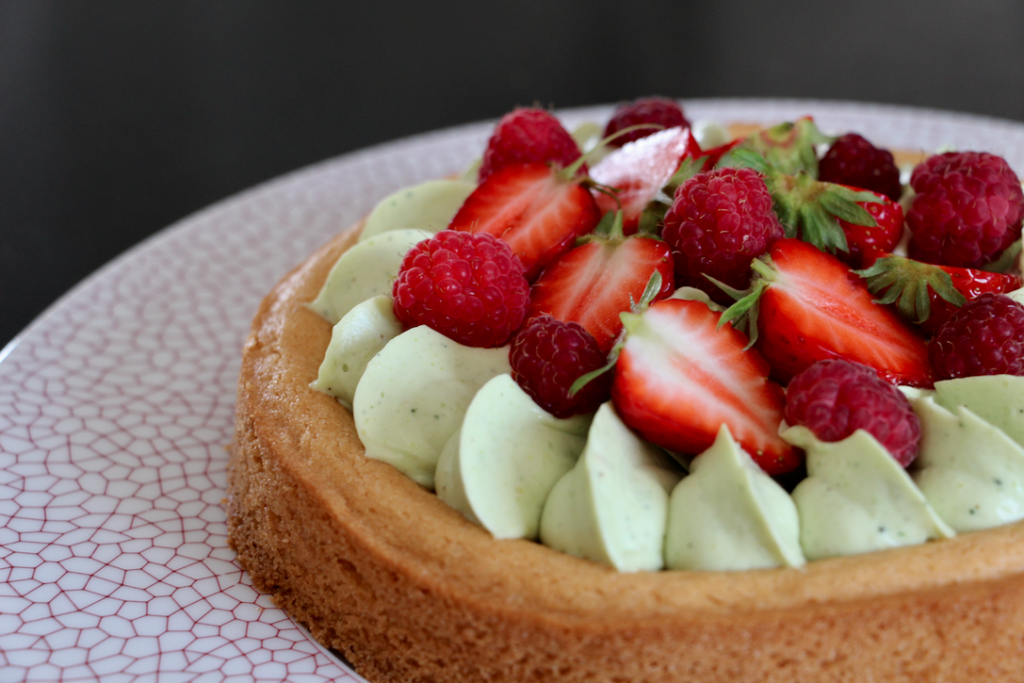
Voici ma tarte pistache et fruits rouges !!
Ce qu’il faut retenir ce cette recette de tarte pistache et fruits rouges
Envie d’en savoir plus ?? Je vous connais bien, je pense que la réponse est oui…
Pour cette recette, il n’y a rien de vraiment compliqué je vous assure. Vous allez réaliser un grand palet breton. Pour cela, on va partir de la recette de Christophe Felder qui est déjà sur le blog en ajustant les quantités des ingrédients.
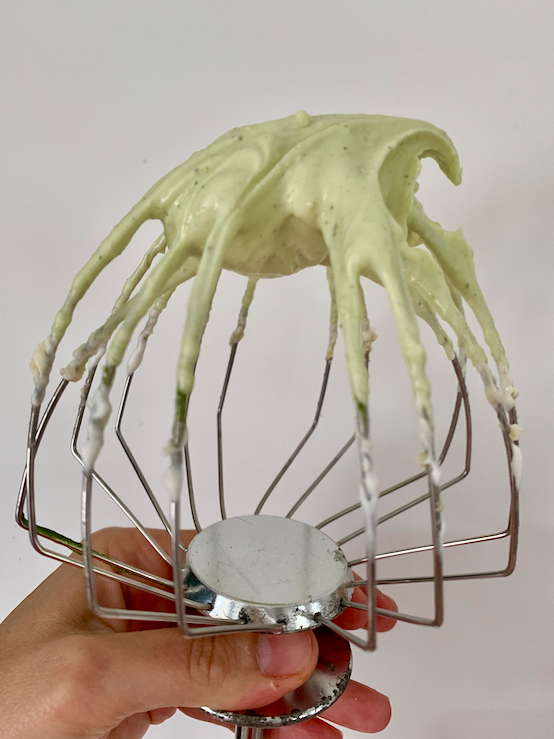
Ensuite on va faire une crème pâtissière un peu plus légère que celle déjà sur le blog (mais le procédé est le même) à laquelle on ajoutera une crème chantilly et de la pâte de pistache du commerce. On aura donc fait une crème diplomate à la pistache.
Et voilà, il n’y aura pas d’autre préparation à réaliser. On est d’accord que tout est largement faisable?
Les ingrédients de cette tarte pistache et fruits rouges
Côté ingrédients, rien que vous n’ayez déjà dans vos placards ou frigo. A part peut-être la pâte à pistache qui se trouve facilement en supermarché.
Il vous restera pas mal de blancs d’œufs, du coup je vous remets le lien vers mon article donnant plein d’idées sur comment utiliser les blancs (ou les jaunes). C’est ici.
L’esthétique de ma tarte pistache et fruits rouges
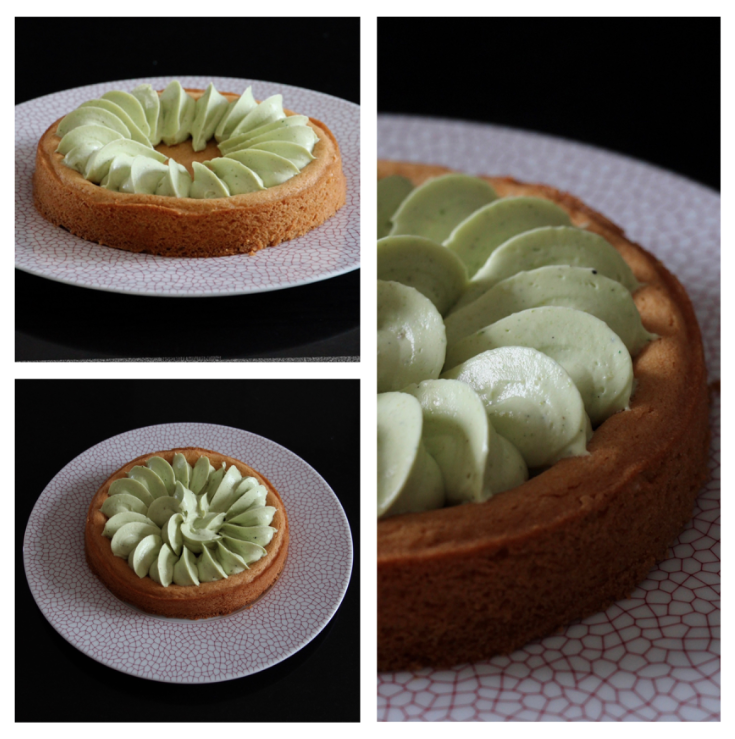
Après il reste le look, l’esthétique. Soit vous êtes à l’aise avec la poche à douille et vous pouvez partir sur une douille Saint Honoré comme ici, ou une douille ronde de 12 ou encore une douille cannelée (8 dents ou 16 dents).
Soit vous étalerez votre crème diplomate avec une spatule et vous disposerez alors vos fruits.
Dans les deux cas, vous obtiendrez une très beau résultat j’en suis sure !!
Une recette versatile
Vous l’imaginez bien, cette recette pourra se décliner au fil des saisons…
En gardant la même base (sablé breton et crème pistache), vous n’aurez qu’à changer les fruits et vous aurez un autre dessert…
Abricots et nectarines en été par exemple, figues ou poires en automne et pourquoi pas des pommes caramélisées en hiver ? Vous voyez, les possibilités sont larges. N’hésitez pas à me donner votre version préférée en commentaire de cette article !
Et pour changer, vous pouvez remplacer la crème pistache par une ganache montée à la pistache, ce sera délicieux !
D’autres recettes gourmandes avec de la pistache et des fruits rouges
(Ajout de juin 2025)
Depuis la création de cette recette, j’ai récidivé avec les associations autour de la pistache que j’adore… Voici donc d’autres idées pour vos goûters et desserts !
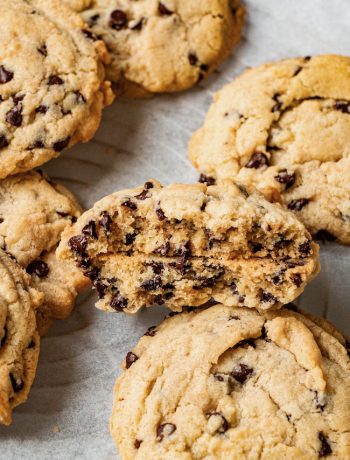
- les financiers pistache et framboises
- les tartelettes express pomme, pignons et pistache
- ou encore la tarte figues et pistache.
Pistache et fruits rouges : une alliance gourmande et raffinée
L’association de la pistache et des fruits rouges séduit de plus en plus les gourmets à la recherche de saveurs originales et équilibrées. À première vue surprenante, cette alliance repose sur un contraste subtil entre la douceur onctueuse de la pistache et l’acidité vive des fruits rouges — fraises, framboises, groseilles ou cerises.
La pistache, avec ses notes légèrement boisées et sa texture crémeuse, apporte une richesse en bouche qui adoucit et équilibre l’intensité acidulée des fruits rouges. Cette complémentarité en fait une combinaison de choix en pâtisserie, que l’on retrouve dans des entremets, macarons, tartes ou glaces.
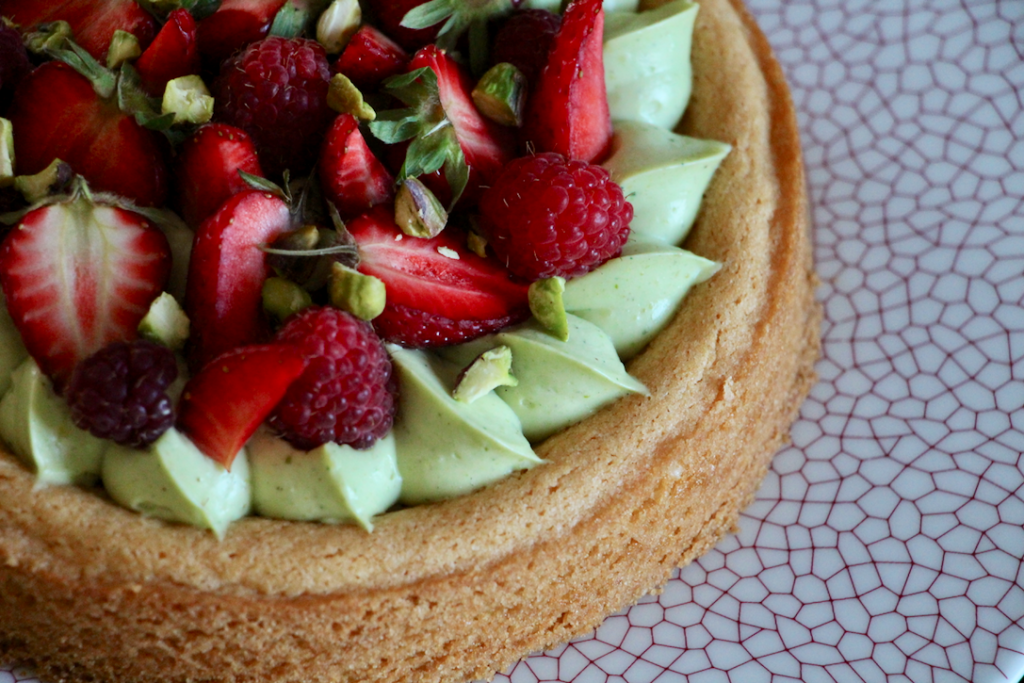
Au-delà de la saveur, l’association joue aussi sur les contrastes visuels?: le vert doux de la pistache met en valeur le rouge éclatant des fruits, offrant des créations aussi belles que savoureuses.
Sur le plan nutritionnel, cette union est également intéressante. Les fruits rouges sont riches en antioxydants, tandis que la pistache fournit des bons lipides, des fibres et des minéraux.
Ainsi, l’accord pistache-fruits rouges allie équilibre, gourmandise et esthétique. Une association audacieuse mais harmonieuse, devenue incontournable dans l’univers de la haute pâtisserie comme dans les créations maison.
Ma recommandation selon le nombre de parts
Je vous propose ici une tarte pour 6 personnes, avec un diamètre de 18-20 cm. Si vous voulez faire un dessert pour 10/12 personnes, utilisez un cercle à pâtisserie de 26 cm et doublez toutes les quantités d’ingrédient.
Les ustensiles nécessaires :
Une casserole à fond épais et un bon fouet (ou un batteur électrique) pour la crème pâtissière,
Un robot pâtissier ou un batteur électrique avec fouet pour la chantilly,
Une poche à douille avec douille,
Une spatule,
Un cercle à pâtisserie ou la charnière d’un moule à charnière (la pâte à sablé breton doit être moulée sinon elle s’étale).
On y est, on se lance !!
La recette, Chef !
Palet breton Mélangez les jaunes d’œufs avec le sucre jusqu'à blanchissement. (j'utilise mon batteur à main avec les fouets). Ajoutez ensuite le beurre jusqu'à obtention d'un mélange homogène. Ajoutez la farine tamisée, le sel et la levure. Mélangez jusqu'à obtention d'une pâte bien homogène. Mettez la pâte dans du film alimentaire et réservez au réfrigérateur pendant 2 heures. Crème pâtissière Mettez les feuilles de gélatine dans de l'eau froide. Versez le lait dans une casserole et ajoutez-y la poudre de vanille. Faites bouillir et retirer aussitôt du feu. Pendant ce temps, blanchissez les jaunes d’œufs, la maïzena et le sucre au fouet. Versez la moitié du lait sur la préparation. Mélangez bien. Versez l'autre moitié, mélangez à nouveau. Mettez toute la préparation dans la casserole et faites bouillir pendant 2 minutes sans cesser de fouetter vivement (sinon votre crème va trop cuire par endroit). (je réalise cette opération à feu moyen) Quand la crème a la bonne consistance, ajoutez les deux feuilles de gélatine essorées. Versez la crème dans un plat et couvrez d'un film alimentaire pour éviter la formation d'une couche sèche. (il doit y avoir contact entre le film et la crème). Réservez au réfrigérateur. Cuisson du palet breton. Préchauffez votre four à 180 degrés. Étalez la pâte sur une épaisseur de 1 cm environ, sur du papier sulfurisé, et placez-la dans le moule. Faites cuire 17 minutes. A la fin de la cuisson, attendez 1 minute avant de démouler et laissez refroidir sur une grille. Crème diplomate Fouettez la crème pâtissière pour la détendre. Montez la crème en chantilly et ajoutez-la à votre crème pâtissière. Vous devez avoir un mélange homogène. Ajoutez finalement la pâte de pistache. Montage final Pochez la crème diplomate sur votre palet breton. Décorez avec des fruits rouges et les pistaches grossièrement hachées. Servez ou réservez au réfrigérateur.Tarte Pistache et Fruits rouges

 ( Vote !)
![]() Loading...
Loading...Ingredients
Instructions

10 Comments
Djilali
27 juin 2019 at 22 h 53 minElle est magnifique. Merci pour la recette
Emma
27 juin 2019 at 23 h 11 minRavie qu’elle vous plaise!!
Alexandre
15 juillet 2019 at 21 h 23 minJ’ai réalisé votre recette à la maison, elle est vraiment top !
Tous mes amis ce sont régalés.
Je l’ai faite avec des cerises, marinées au miel, citron et un soupçon de poivre sauvage de Madagascar.
Un vrai délice.
Merci milles fois pour cette recette.
Alexandre
Emma
16 juillet 2019 at 10 h 21 minMerci Alexandre pour ce retour !! J’en suis ravie !! Et merci aussi pour cette belle déclinaison !!
Nathalie
1 mai 2020 at 18 h 26 minBonjour Emma,
Elle est magnifique cette tarte! J’ai une petite question, la pâte de pistache c’est celle qui est sucrée ou est-ce celle 100% pistache? Je vois des pâtes de pistache sucrées et d’autres pas…
Emma
2 mai 2020 at 17 h 26 minBonjour Nathalie, c’est une pâte pistache sucrée que j’utilise. 😉
Elo
7 mai 2020 at 18 h 41 minJe vais me lancer … ça me tente bien ‘
J’ai une seule question: peut on le faire la veille le biscuit ? Ou est ce qu’il risque de ramollir de trop ?
Merci
Emma
8 mai 2020 at 8 h 08 minoui ça ira sans souci, le palet breton se conserve bien, idéalement dans une boîte en métal, mais pour une nuit ça ne devrait pas poser de problème
Luis
16 août 2020 at 18 h 32 minBonjour,
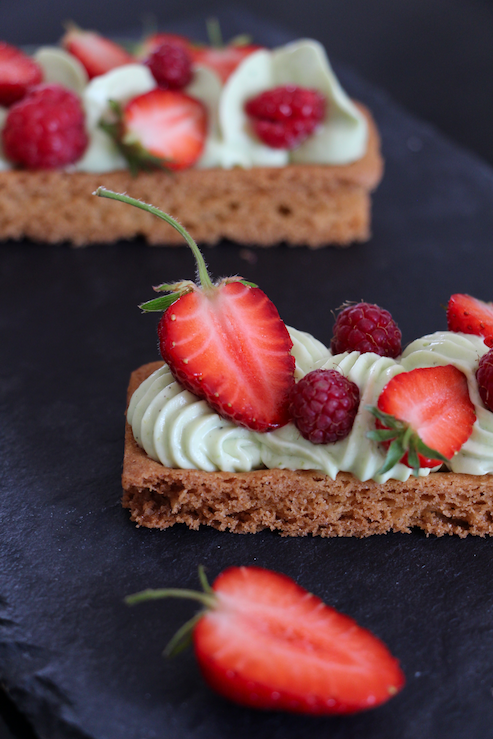
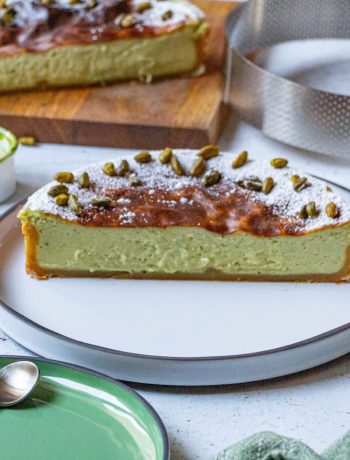
On devine sur les photos (c’est évident sur la n°4) un grand creux central dans le palet. C’est comme si la pâte avait levé à la périphérie sur 2 ou 3 cm de largeur, mais beaucoup moins levé au centre.
C’est un effet très réussi et très pratique pour l’agencement de la garniture.
Ma question : comment avez-vous produit ce creux ou si vous préférez comment avez vous ralenti la pousse au centre du palet ?
J’ai bien une petite idée mais je vous laisse l’exclusivité…
A vous lire chère Emma
Bien à vous.
Emma
16 août 2020 at 20 h 06 minBonjour ! Oui c’est bien pratique ce creux qui se forme naturellement à la cuisson. La pâte au bord chauffe plus vite et gonfle plus vite et plus longtemps que le centre. 😉